- 25 Sep 2023
- 4 Minutes to read
- Print
- DarkLight
Setting up an Issue
- Updated on 25 Sep 2023
- 4 Minutes to read
- Print
- DarkLight
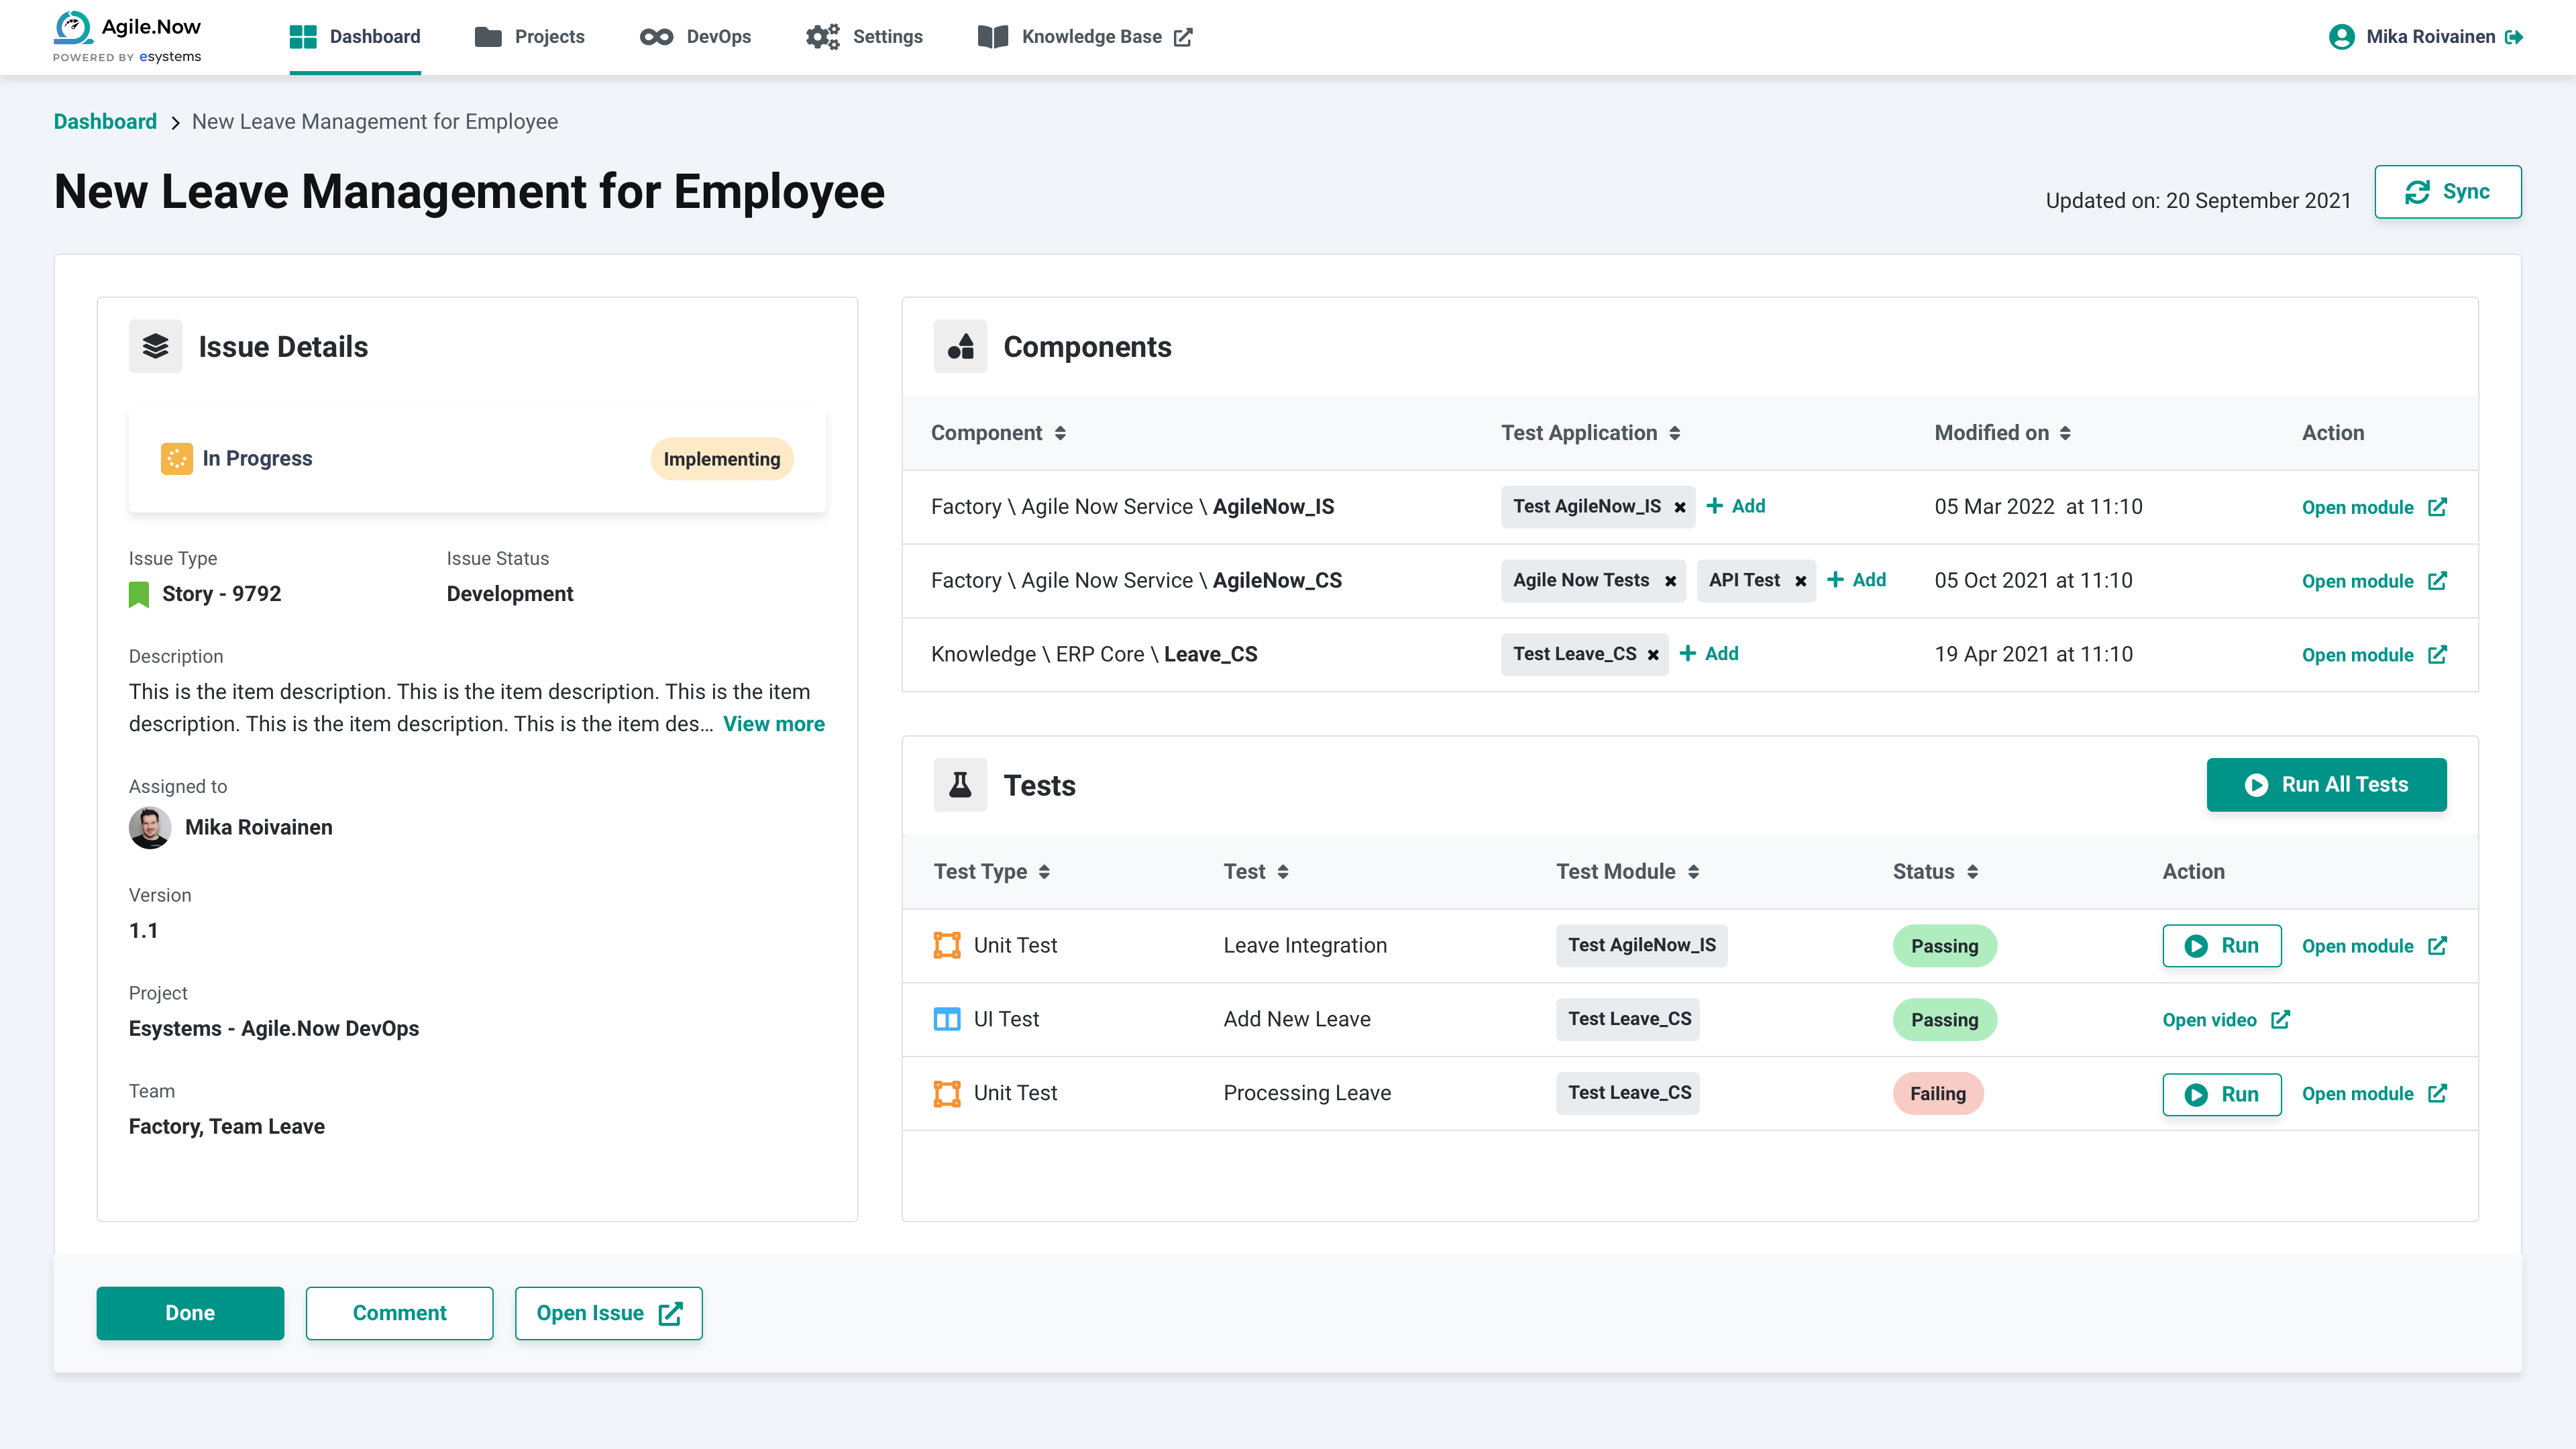
The user will be able to navigate to an individual issue list right from the dashboard. Based on the user logged, the list would be modified to depict the user's assigned issues so that the developer will be able to take necessary actions immediately. In other words, the developer will be able to take an issue from his/her list of to do's and work on it. Once the user selects an issue, the details view of that issue will be visible to the user. The user will be able to see the option to start working on the issue. the user will be able to start working on it and once its fixed, the user will be able to run all the tests manually by clicking the "Run all tests" button.
Issue actions
| Status of issue | Environment(s) | Action status | Positive action | Negative action |
|---|---|---|---|---|
| Implement | Development | Mandatory | Start work - Start implementation of the issue | - |
| Implementing | Development | Mandatory | Done - Mark the issue as done | - |
| Implemented | Development | Mandatory | Start review - Start reviewing of the issue | - |
| Reviewing | Development | Optional | Approve - Mark the issue as reviewed | Needs rework - Mark the issue as incomplete |
| Test | Testing, acceptance testing | Mandatory | Start testing - Start testing of issue | - |
| Testing | Testing, acceptance testing | Mandatory | Accept - Mark the issue as tested? | Reject - Mark the issue as rejected |
Once an issue is selected from the dashboard, the issue screen would have various action items which the user can perform. They are mentioned below:
- Run all tests
- This would mean that all the tests that are assigned to that issue would be run one after the other to test the sanctity of the issue.
- Run individual tests
- It will also be possible to run a single test from a list of tests to test the sanctity of the issue under consideration.
- It is possible to open a test application in the Outsystems Service Studio directly from the test application list by clicking on the Open Module button across each test application.
- Components
- The components module displays a list of components imported directly from the Project management tool.
- Each module is assigned a set of test applications associated to that modules. It is possible for the user to add necessary test applications to each modules manually.
- It should be possible to add more test applications to a module with the help of the add button present in the Test Application column.
- It is also possible to open a module in the Outsystems Service Studio directly from the test application list by clicking on the Open Module button across each test application.
- Add modules Manually:
- Modules for an issue is usually added in the project management tool and migrated to the Agile.Now Factory during synchronisation. However this is a slow process and has to wait up on the synchronisation action to be triggered. There is an alternative way to add components which is explained below.
- It is possible to add components manually to an issue. This is done with the help of an Add Component button. When the user clicks on Add Component, a window opens up with a list of components that were assigned to the issue from the project management tool such as JIRA or Azure but were not already added in the Agile.Now Factory tool.
- Once the components are added, the user will be able to add new test suites to the components. Once the test suites are added, the user will also be able to see the different tests under that test suite that is waiting to get executed.
- Synchronization
- The sync button on top right of the issue dashboard helps get all the data from the Outsystems service studio and the project management tool such as Jira to be synced with the Agile.Now Factory. If the user is inside an issue, from an issue level, all the data will be synced when the sync button is clicked. For example, if the user open the issue from the project management tool and then add a new component, once hitting the sync button would import the latest settings of the issue from the PM tool directly to the issue dashboard. In this case, the user will see the new component listed within the components list.

Fig: Dashboard-User perspective
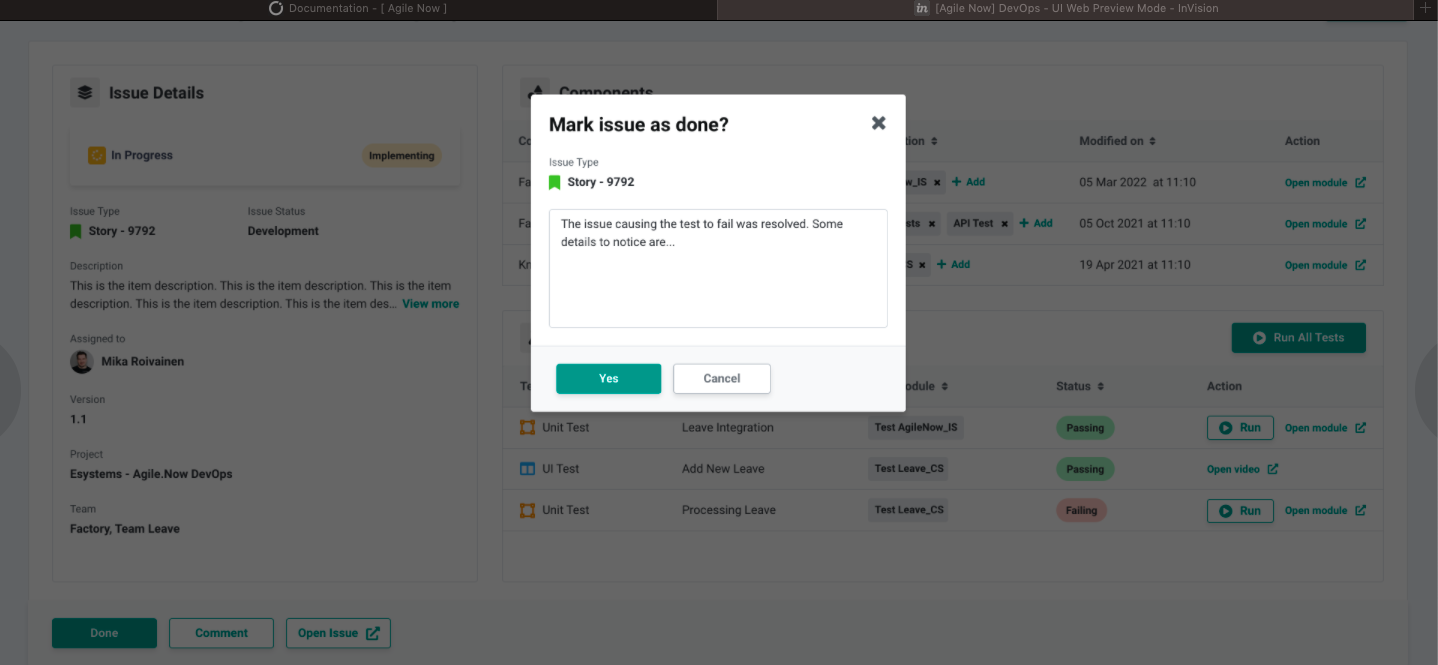
After this, the user will be able to modify the status of the issue to done. The user will be prompted to give an info on what has been done and can submit the issue.

Fig: User Submit a issue
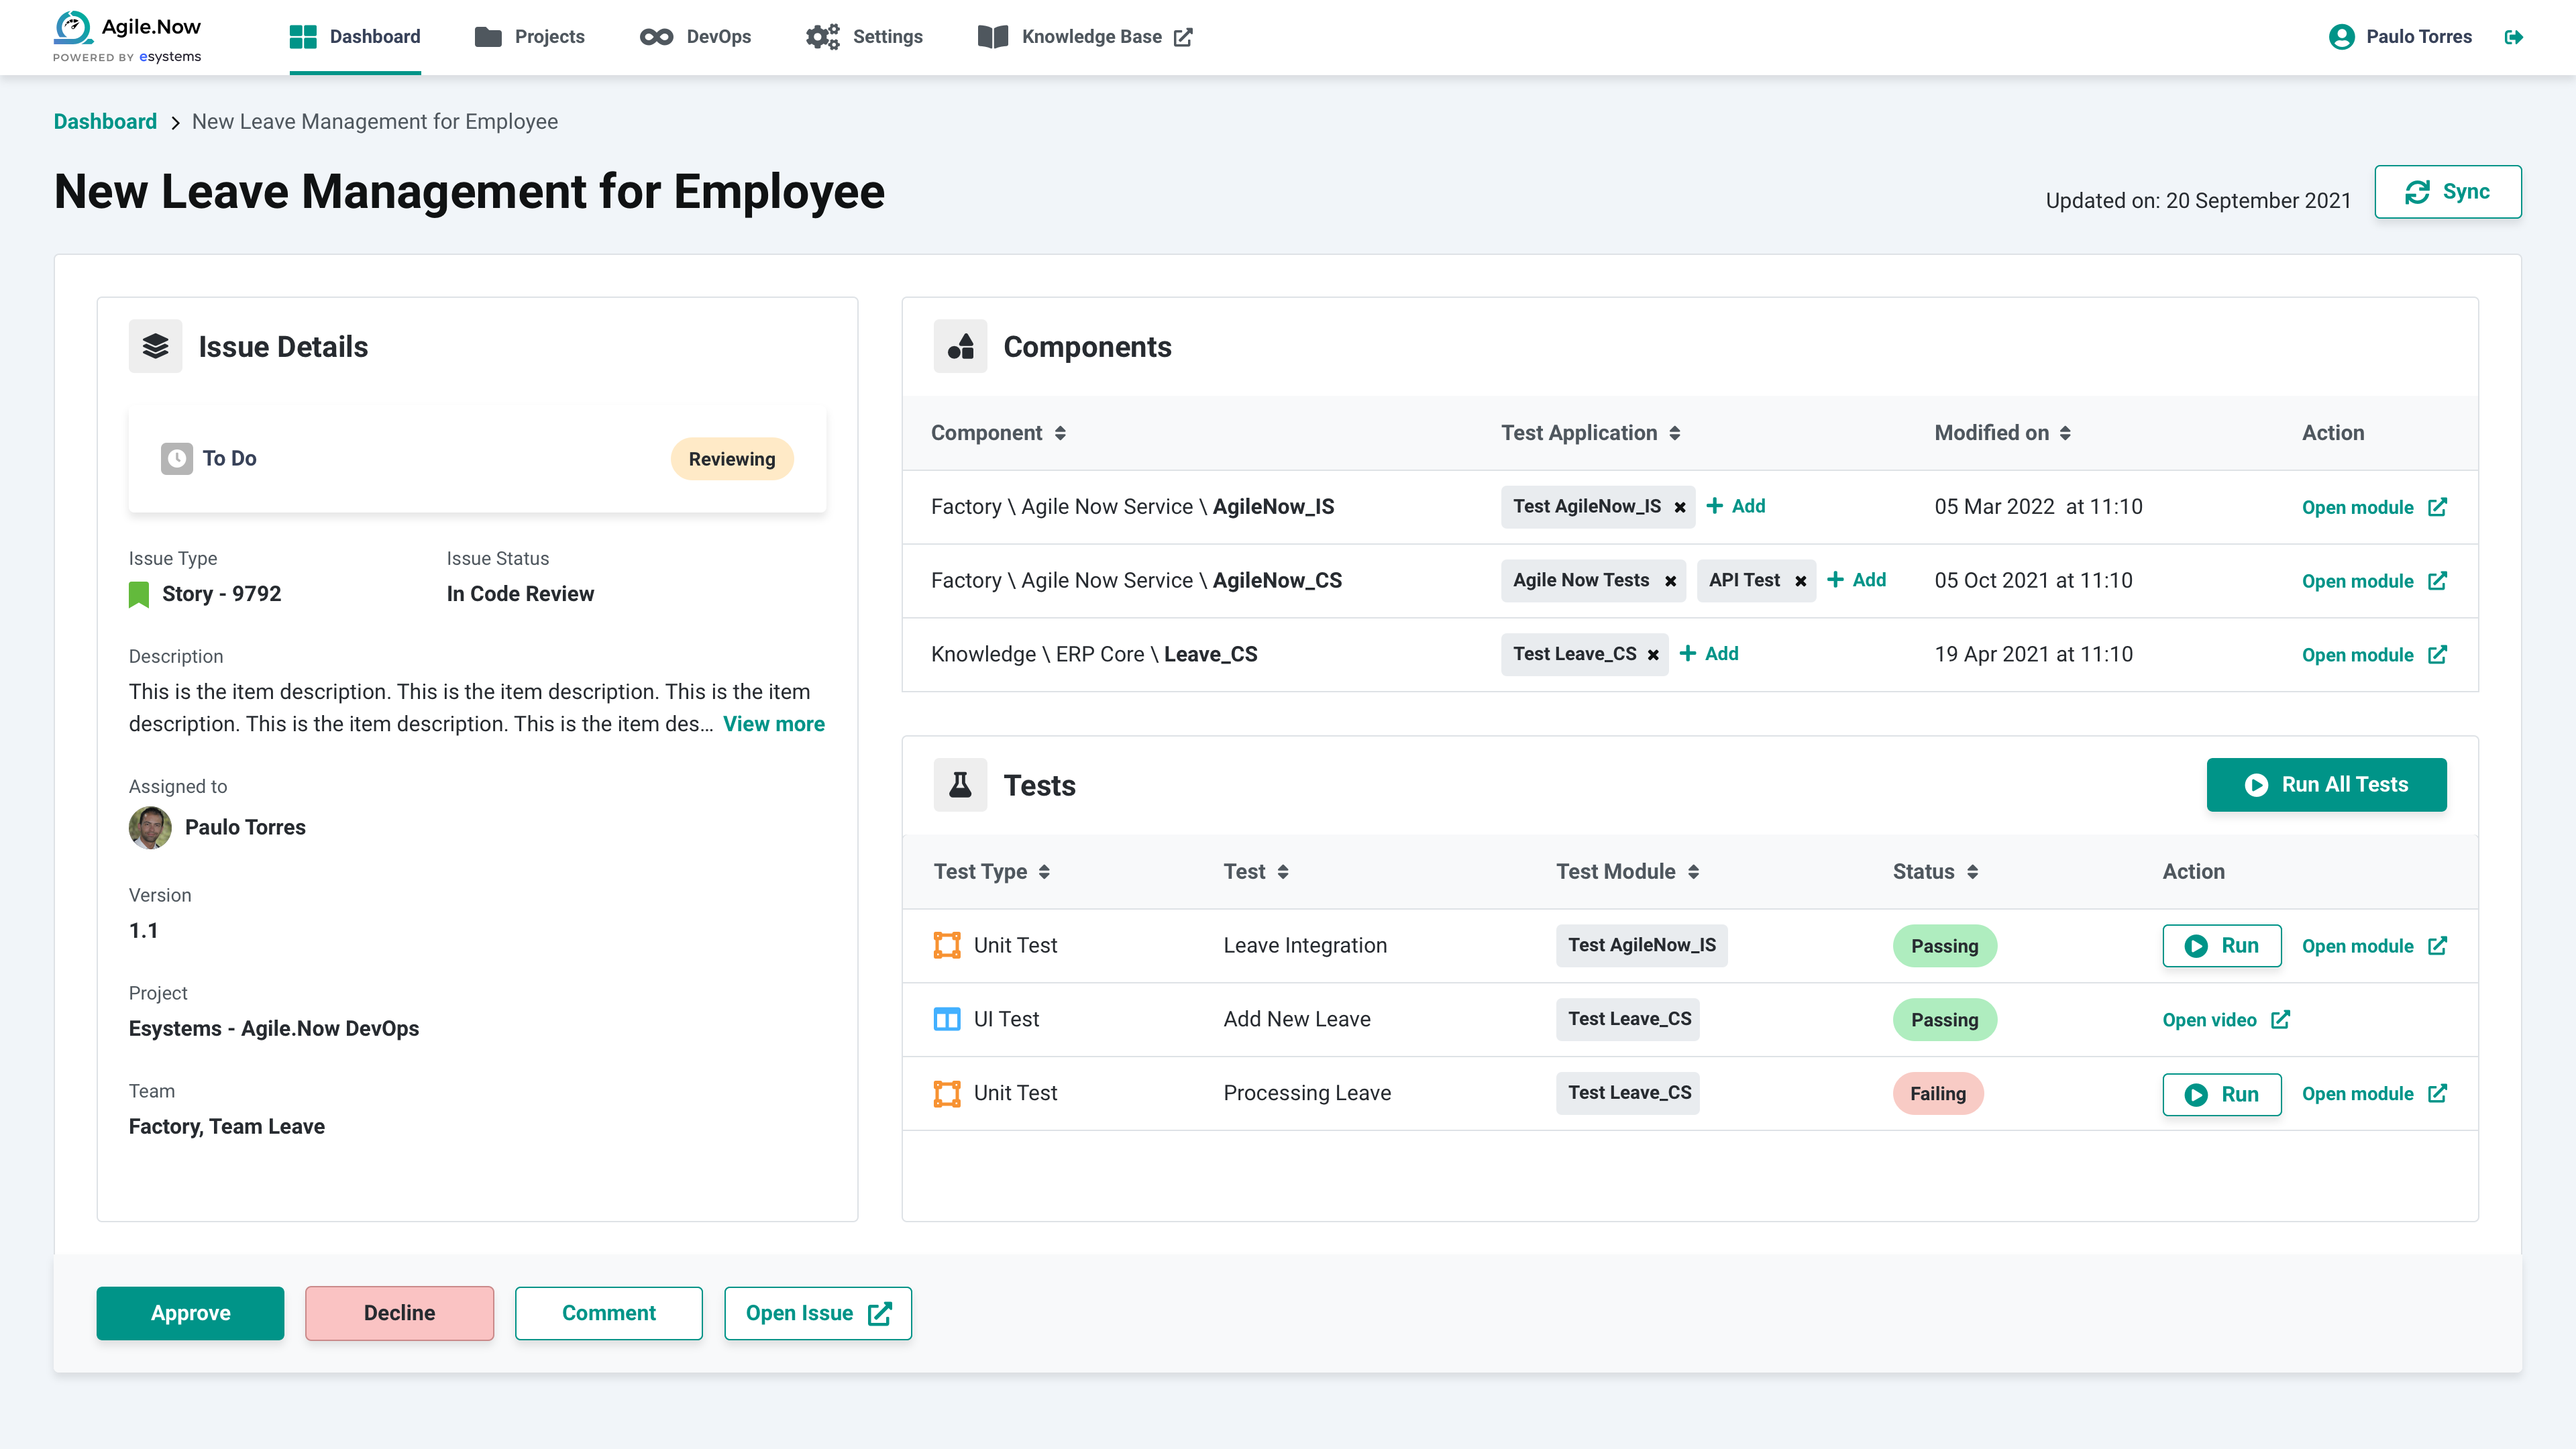
Once the developer submits an issue, the issue will be assigned to a tech lead. The status of the issue at this point of time could be in "In Code Review" mode. The tech lead can verify the status of the tests and based on the outcome, the user can accept or reject the issue. Once a issue is accepted, it will get ready for deployment. If it fails, the issues moves back to development state. Each time, it should be possible for the tech lead to update the comments about the outcome of the review.

fig: Issue Review Dashboard
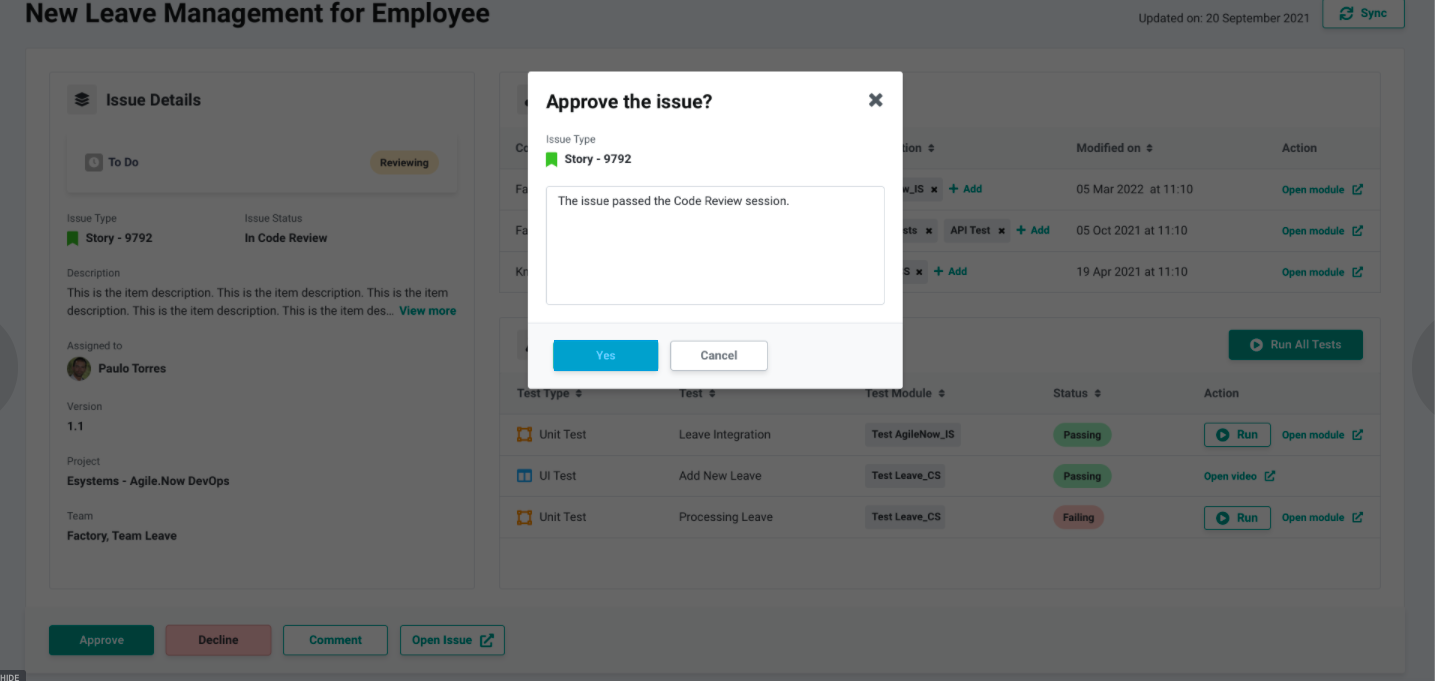
The tech lead can either approve the code after it has been reviewed to allow it to move on to automated testing, or a comment can be left for the developer to fix an outstanding issue. This testing approval then allows Agile.Now to move the issue into automated testing (if configured) and automated publishing (if configured) to further environments.
fig: Issue review status.
History
All linked issue display history information. You can see the whole issue lifecycle and who has done what. This increases transparency for project stakeholders and enables traceability for activities such as testing.


