Activating Single Sign-On (SSO) allows users on Agile.Now platform to log in using their Okta credentials, streamlining the login process and enhancing security.
With Okta configured, you'll provide a seamless login experience for users and maintain organizational structure within your Agile.Now environment.
The configuration flow consists of two parts: on Okta side and on Agile.Now side.
Configuring on Okta platform
To configure Okta for SSO, including synchronization of user groups, follow these steps.
Register an Application in Okta
To enable OAuth 2.0 authentication using the client credentials grant type register the client application in Okta. For general guidance, refer to Create OIDC app integrations.
- Go to Okta admin console
- From the menu go to Applications
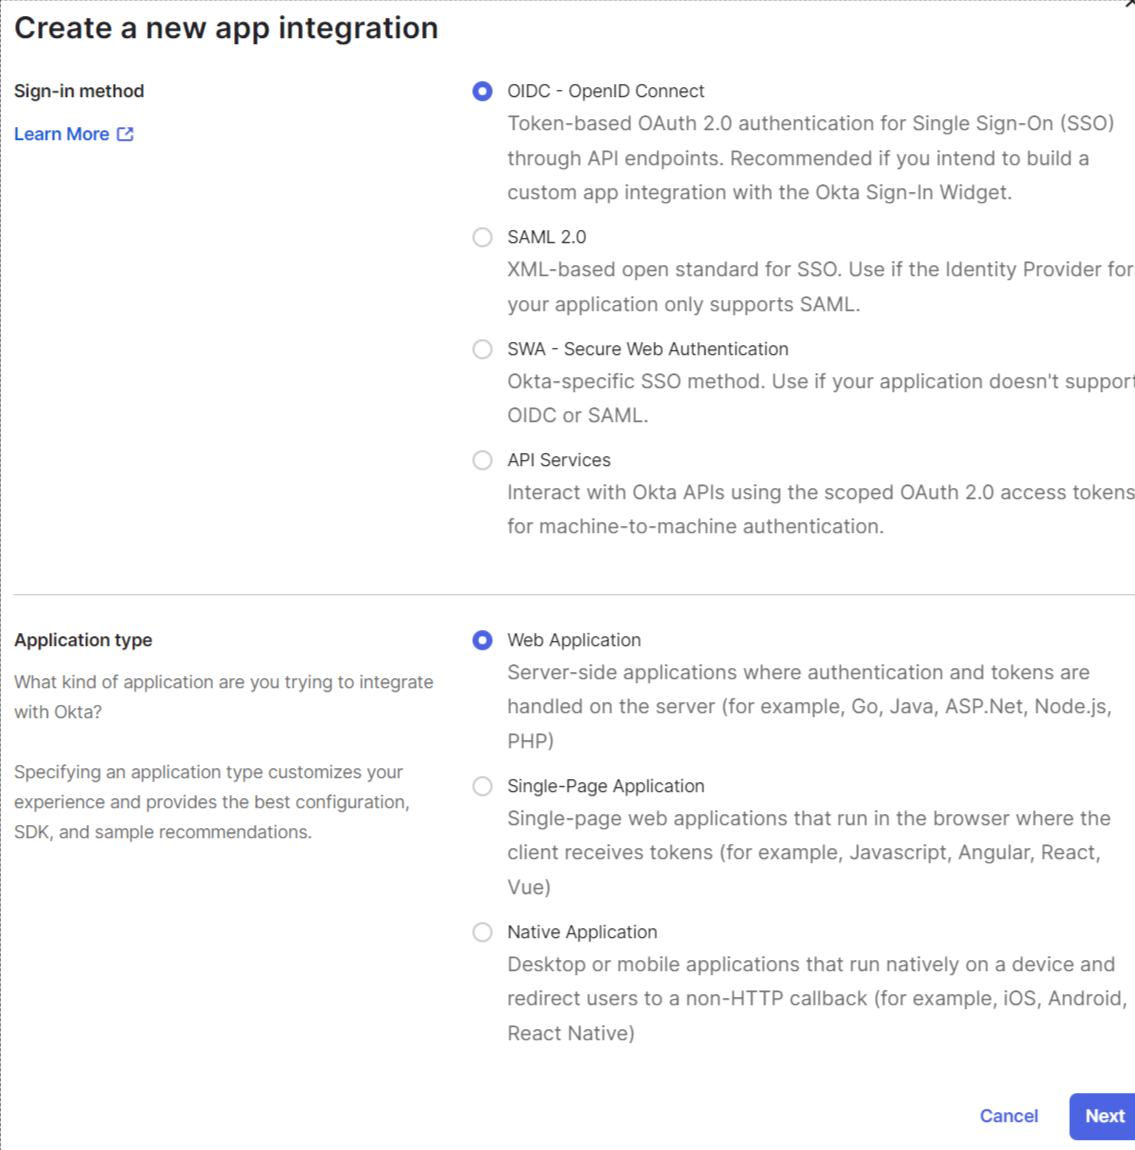
- Click Create App Integration
- Choose Sign-in method, e.g. OIDC - OpenID Connect
- Choose Application type, e.g. Web Application
A client application requests access to a protected resource. Below are next configuration steps with more details that will help you to apply the client credentials grant type.
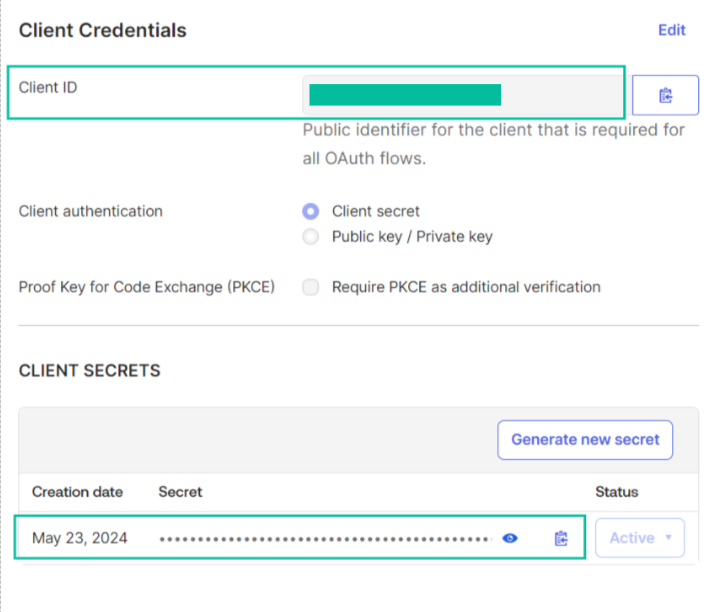
Client ID and Secret
Copy Client ID and Client Secret. You'll need them further to link the client to the web service and configure request authentication.
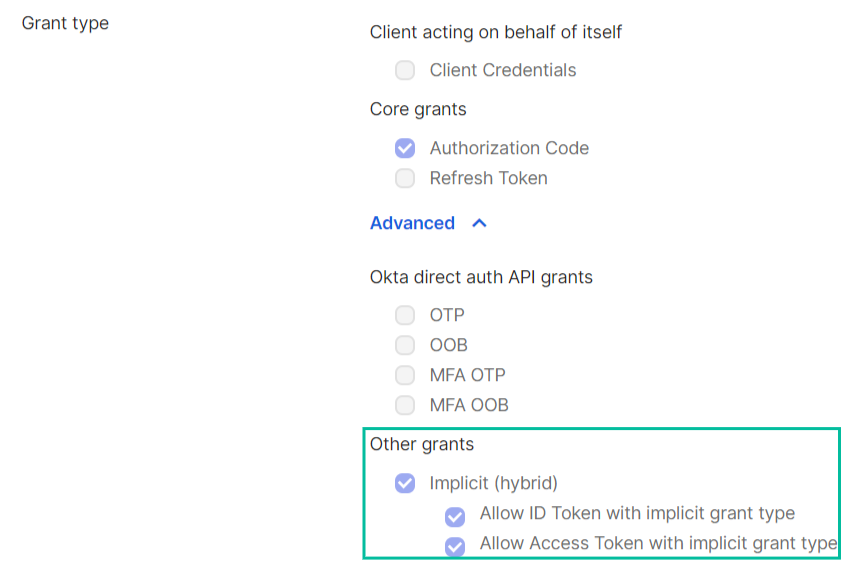
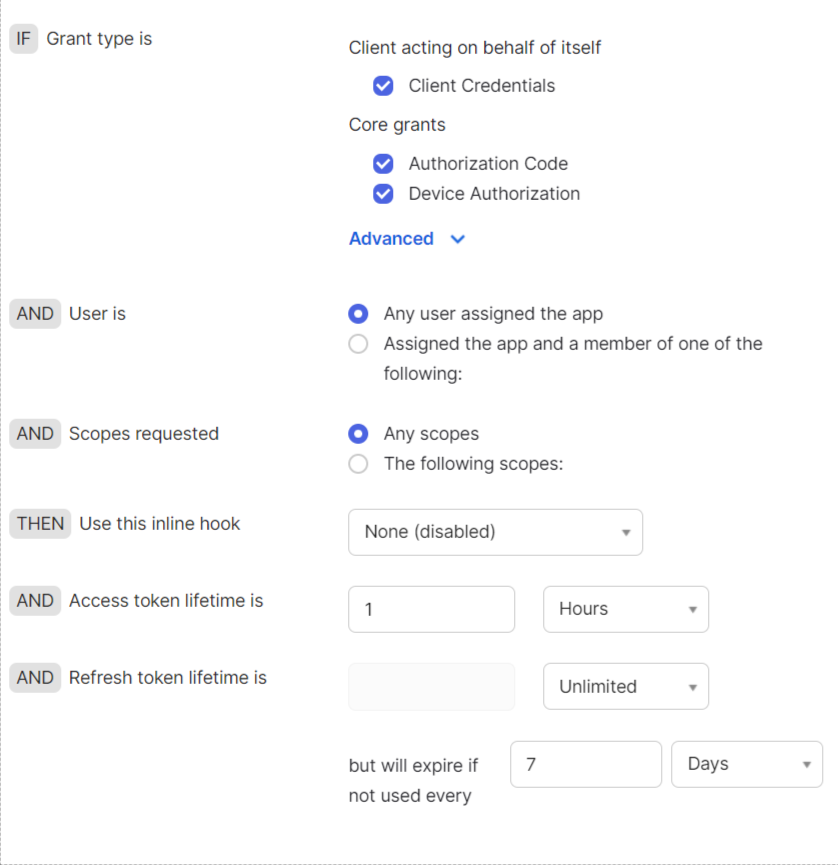
Grant type
Specify Grant Type as below
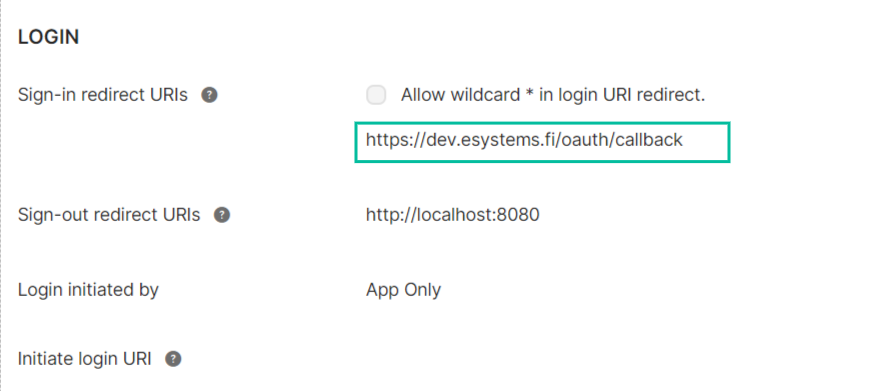
Redirect URL
These URL can be obtained from the Agile.Now platform when creating a new provider. E.g. see below
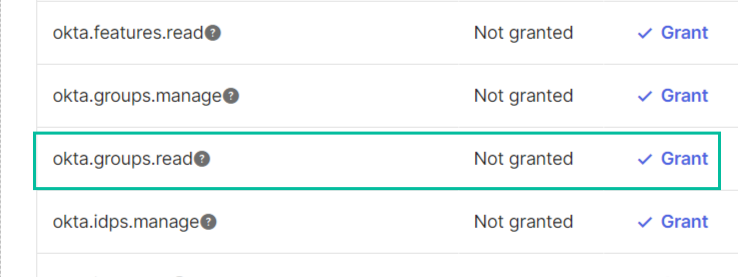
Configure groups API
To allow the client to access user groups information, the Groups API scope should be added.
- On application page go to Okta API Scopes tab
- Find okta.groups.read scope and click Grant
Configure Authorisation server
An authorisation server resolves authorisation requests according to the requested scopes.
(see more here Authorization servers)
Okta creates a default custom authorisation server for your automatically, but this custom authorisation server cannot process Okta API scopes, e.g. okta.groups.read (see above)
In this case create your own authorisation server
- From the menu go to Security -> API page click Add Authorisation Server
- Fill the required fields such as Name etc.
- On Access Policies click Add New Access Policy
- Click Add rule and specify the way how certain scopes will be authorised. Using the flow language on the page create rules for specific scopes and specific access accordingly. E.g. on the screenshot below the rule simply allows all (see more here Create Rules for each Access Policy)
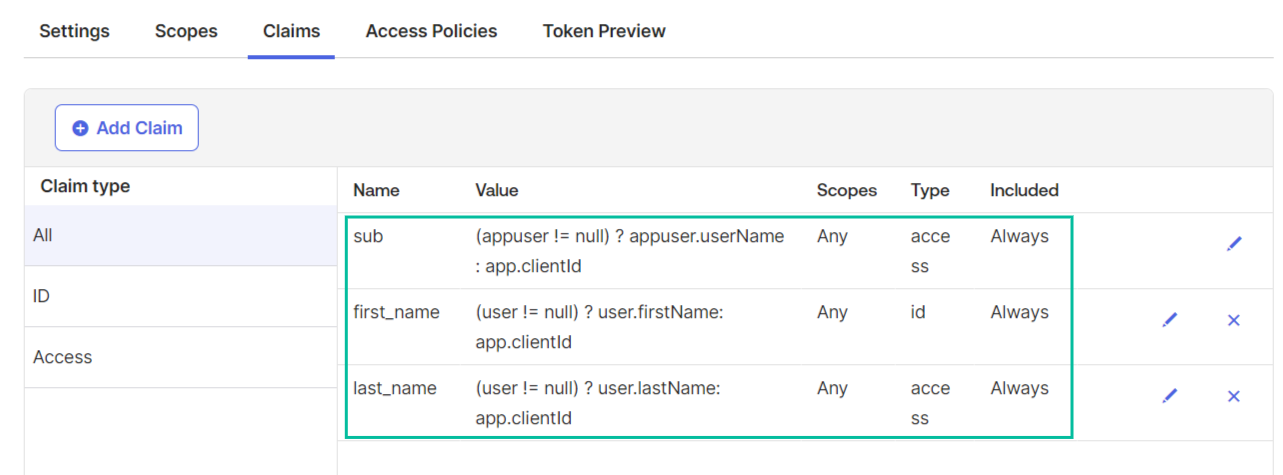
Configure claims
The predefined set of claims can be seen in discovery metadata provided for the authorisation server. The metadata URL looks like https://{your okta domain}.okta.com/.well-known/openid-configuration. Browse to this URL and find the claims in claims_supported section.
See Claims Mapping below to map these claims to Agile.Now claims
You can also add custom claims (see more here Customize tokens returned from Okta with custom claims)
- Go to your authorisation server (see above)
- Go to Claims tab
- Add claims using the embedded expression language
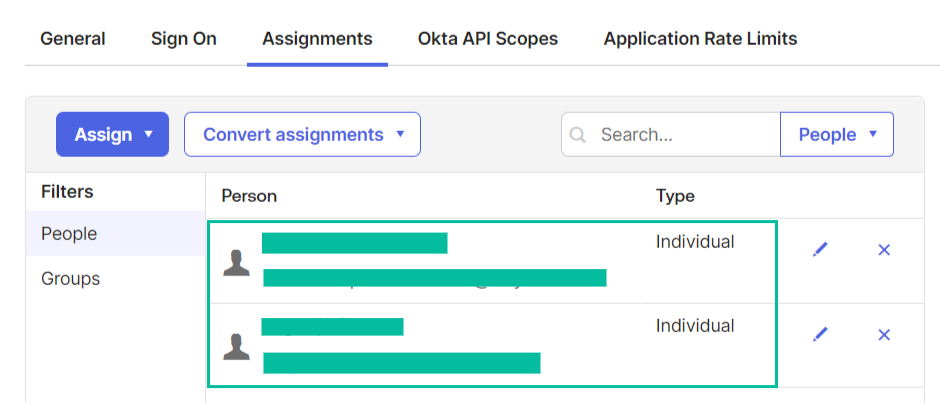
Configure users
To allow new users to authenticate with the application assign them to it
- On the application page go to Assignments tab
- Assign users
or
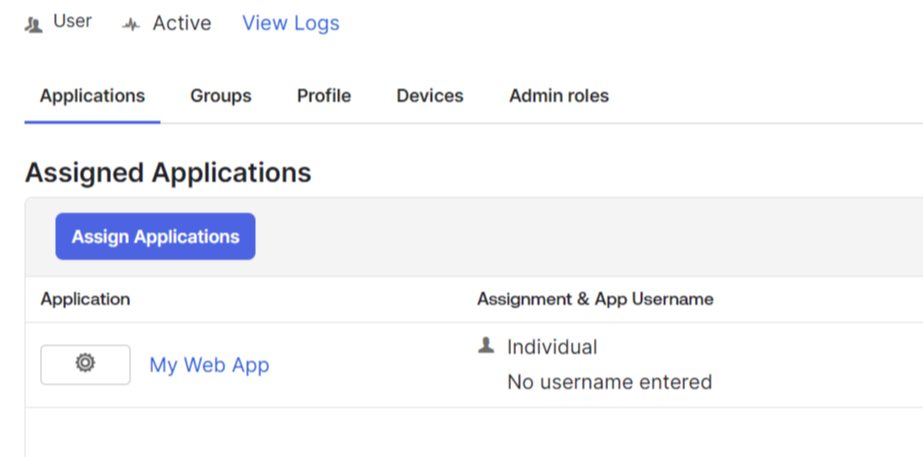
- Go to Directory -> People page
- Select a user
- Go to Applications tab
- Click Assign Applications
Remember to regularly review and update user permissions as necessary to ensure continued operation and security compliance.
Configuring SSO with Okta on Agile.Now
You are now ready to integrate Okta provider with the Agile.Now Platform.
Follow the steps in Configuring SSO in Agile.Now